Dashboard Campus Settings
Go to Settings > Campuses
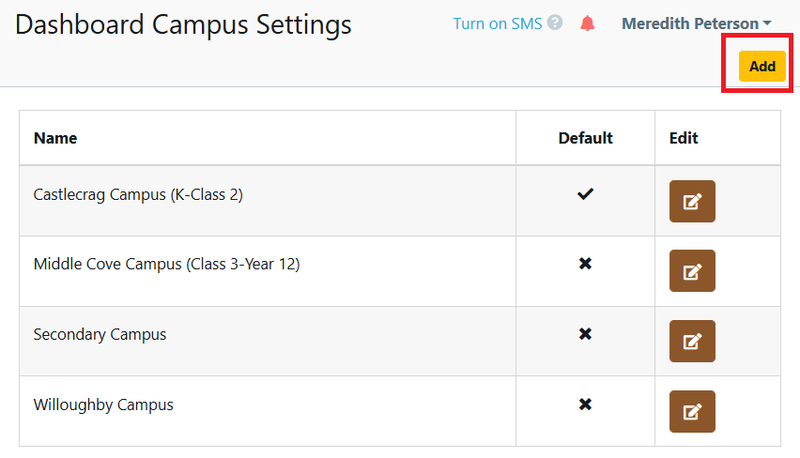
Select Edit the campus required or Add to create an additional campus.
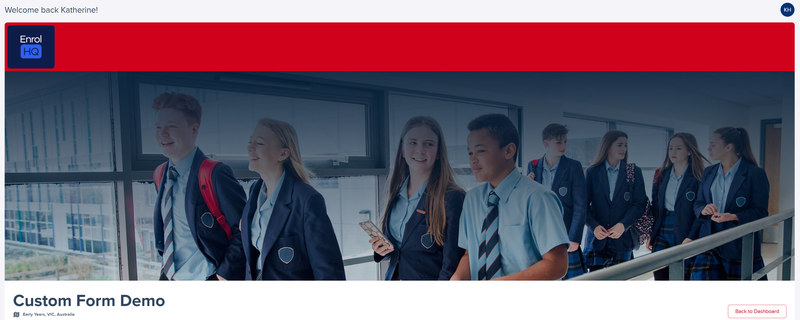
Note: The name of the campus is of the default campus is displayed on your parent dashboard.
Use Edit to view or amend the campus
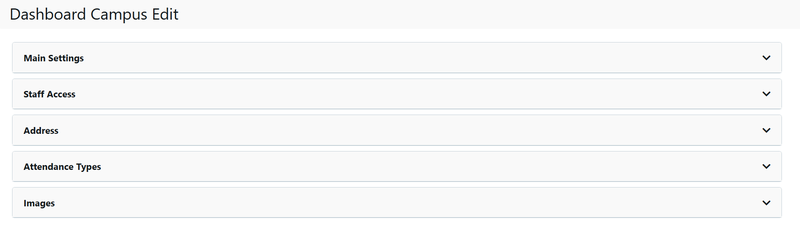
- Main Settings
- Staff Access
- Address
- Attendance Types
- Images
Main Settings
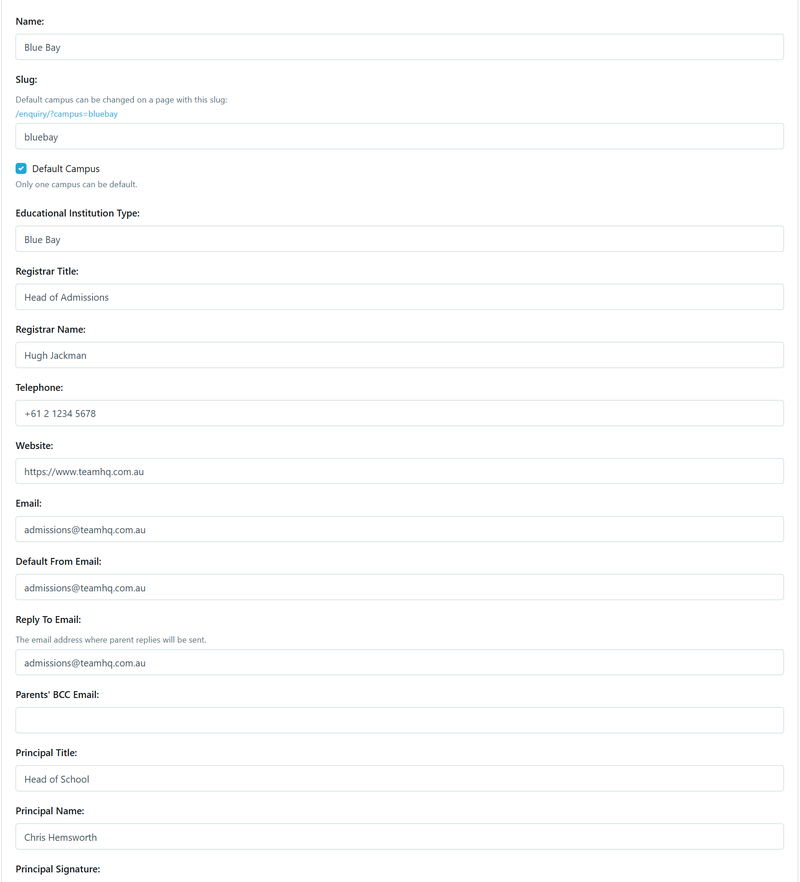
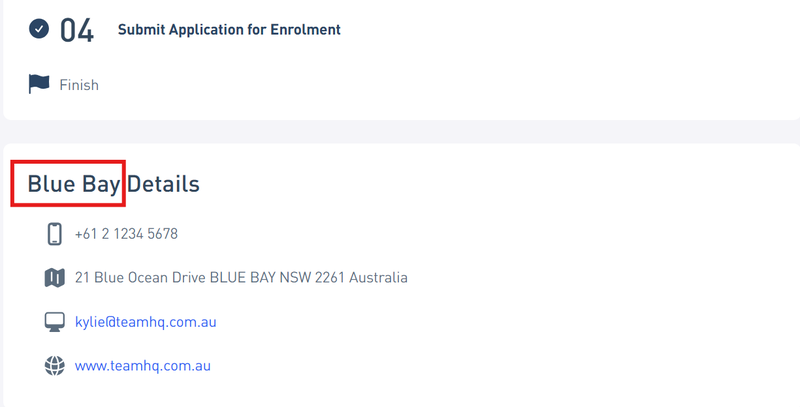
Name - default is Main, however each school may change the name to suit their school (see image above).
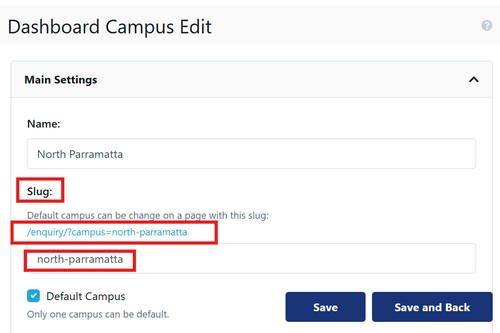
Slug - custom URL name that cannot have spaces (separate words with -).
Default Campus - can only be set for one campus. This is the default shown on the parent dashboard and any form unless an alternate campus is available and selected.
Educational Institution Type - the name inserted here will be shown at the bottom of your forms, eg
Registrar Title - the default, Registrar, can be amended to suit your school.
Registrar Name - staff member in charge of enrolments or admissions.
Telephone - contact number for the campus.
Website - Campus Specific Website linked to parent dashboard
Email - add the email address used for enrolments/admissions to put on the enrolment form and email notifications.
Default From Email - add the default email address you wish parents to receive the email from for this campus
Reply To Email - add the default email address you wish parents to respond to - usually it will be the same as the Email address above.
Parents' BCC Email: - this is the email address where all emails that are sent to parents will be blind copied to. Some schools want to keep a full record of every email that is sent to parents so they will set up a special email inbox to receive a copy of emails that can be searched for later. The default is blank.
Principal Title - the default is Principal. This detail is added to the enrolment forms upon completion if selected.
Principal Name - This detail is added to the enrolment forms upon completion if selected
Principal Signature - drag and drop a signature here. This detail is added to the enrolment forms upon completion if selected.
Remember to Save or Save & Back
Staff Access
Multi-campus schools can decide which staff has access to a campus.
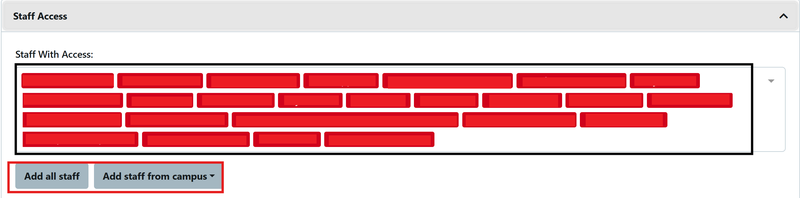
You can use:
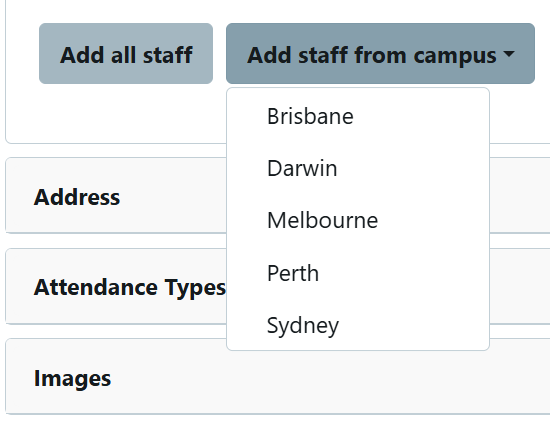
- Add all staff to add all currently active staff logins, or
- Add Staff from campus to add currently active staff specified in User Management for that campus.
Staff access can also be set up in the one place for all campuses in User Management, tied to the Roles and Permissions. Only staff with the appropriate permissions can alter Staff Campus access.
Address
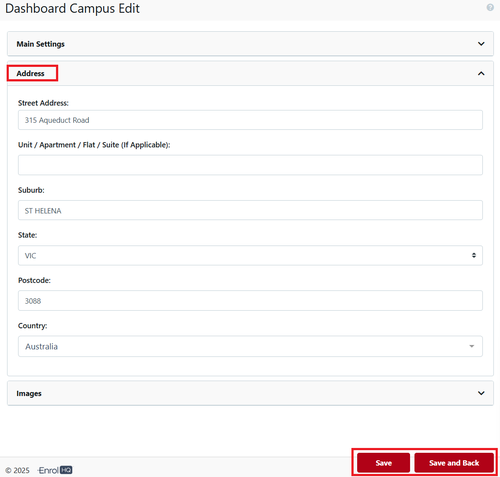
Street Address - physical location of the school
Unit / Apartment / Flat / Suite (If Applicable)
Suburb - will automatically appear in Capital letters
State - drop down menu
Postcode
Country
Remember to Save or Save & Back
Attendance Types
Specify whether the campus hosts day students, boarders and another type of student based on their attendance.
Attendance Type is initially set up in Settings > School Details > Attendance Types & Fee
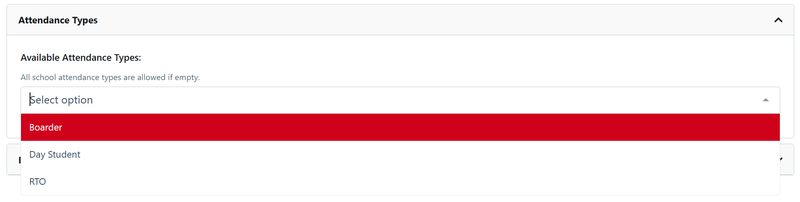
Note: this allows forms to be prefilled with the attendance types available for that campus.
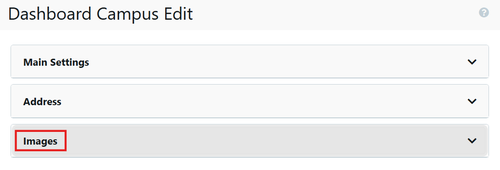
Images
Select the Main Campus using the edit to view/alter and select Images to update the default Images used on the Links.
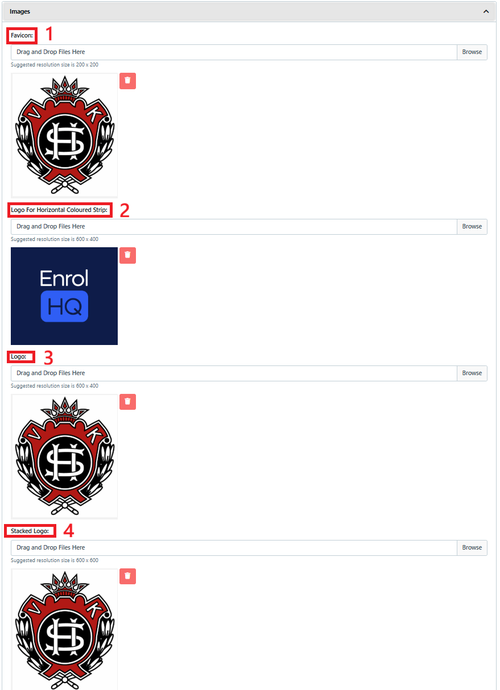
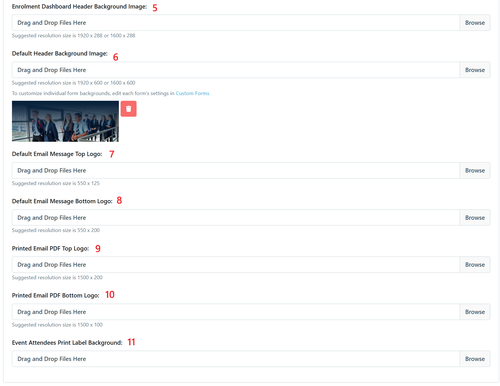
1 Favicon (200x200) - this image is used on your browser tab
2 Logo (600x400) - this image is used on the Parent Dashboard and in the default header of PDF files and the Interview Review sheet.
3 Logo For Horizontal Coloured Strip (600x400) - image is used on all forms when if you select the Custom Form Campus option to Add horizontal coloured strip across the top of image to showcase logo
4 Stacked Logo (600x600px) - image is used on all forms and the Parent Dashboard in the top left.
5 P Dashboard Header Background Image (1920 x 288px or 1600 x 288px) : is for the header of the Parent Dashboard
6 P Dashboard Header Large Background Image (1920 x 600px or 1600 x 600px): is for your default Forms Header (application, enquiry, events etc)
7 Default Email Message Top Logo (550 x 125px): This is the default image is used on all Emails. NB: you can change to a custom header image when editing your individual email under Advanced settings.
8 Default Email Message Bottom Logo (550 x 200px): This is the default footer image used on all emails. NB: you can change to a custom footer image when editing your individual email under Advanced settings
9 Printed PDF Top Logo (1500 x 200px): This image is used as a Top Logo on all Printed PDF's
10 Printed PDF Bottom Logo (1500 x 100px): This image is used as a footer on all Printed PDF's and is optional.
11 Event Attendees Print Label Background: This background image is used for displaying your logo when Printing Event Attendees labels. The labels will print to Avery Labels Sure Feed SKU 959004 / L7163 which is a page of 14 labels (2 columns, 7 rows). Each label is 38.1mm tall and 99mm wide. Generally the logo is set to the bottom right corner as it will be overprinted with the Attendee name.
If the images do not suit the suggested resolution, feel free to adjust.
A new feature allows schools to add separate images and logos to individual forms see Custom Form Optional Look and Feel Settings
How to create a Printed PDF Top Logo (1500 x 200px) or Bottom Logo (1500 x 100px)
This image is used as a Top Logo on all Printed PDF's, it needs to be set in whitespace for the logo to be displayed at the correct size
You can create the Top image that's 1500x200 to fit that size by using Google Gemini link (it's an AI tool really cool for fixing images).
Go to the Gemini AI tool and request the following:
Create a 1500x200 image with a white background with the provided logo in the middle (or on the left or right)
add the preferred image
Gemini will provide the image with the white space

Note: the black line is just to show the whitespace and is not part of the image.
This image is used as a Bottom Logo on all Printed PDF's, it needs to be set in whitespace for the logo to be displayed at the correct size
use the same method as above just ask for the different size 1500x100.
How to create an Event Attendees Print Label Background Image
This image is used as a logo on the labels, it needs to be set in whitespace for the log to be displayed at the correct size
You can create an image that's 450x170 to fit that size by using Affinity by CANVA available for Mac and Windows (it's an Picture Editing tool really cool for creating images).
Create a 450x170 image with a white background with the provided logo on the right hand side
We recommend you use the Stacked logo image.
Campus Links for Forms
Some schools have multiple campuses with different forms based on the campus. This can be an Enquiry, Application or Register Your Interest. It may also include Bookings.
Parent links for forms based on campus settings are located in Parent Links.
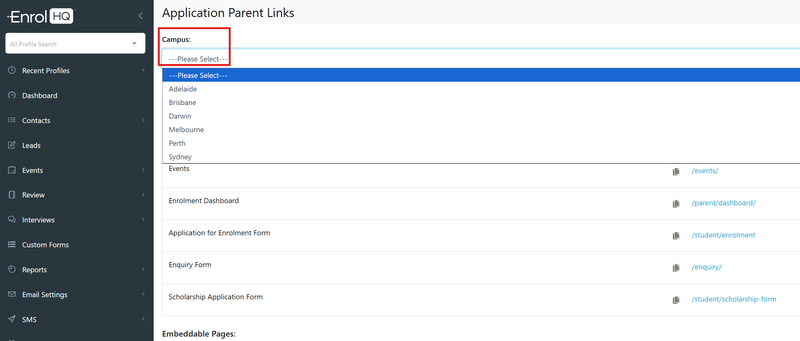
If you are a Multi Campus School you may wish to use these tools to put different links in separate sections of your website
If any form needs to be setup for a particular campus you can add an extension to the URL by copying the campus include or exclude option in Settings>Campuses>Main Settings
Example for a campus called north-parramatta is
?campus=north-parramatta
This image is the campus option for the Enquiry form (the different links that allow this exclusion are all available in Parent Links)
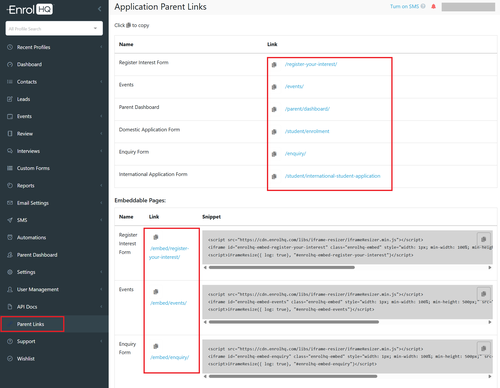
Note: this allows forms to be prefilled with the campus and attendance types available.